17 KiB
Getting Started with NSPanel HA Blueprint
Welcome to this setup guide, a community-driven approach to integrating NSPanel into your smart home. Designed for users at all levels, it combines Home Assistant's user-friendly interface with ESPHome's customization options.
Whether you're a first-time smart device user or an enthusiast looking to personalize your setup, this guide provides the necessary tools and instructions. Let's embark on creating a smart home that's uniquely yours.
Attention
Some images or instructions on this guide might be slighly different due to different configurations depending on your ESPHome and Home Assistant implementation or versions.
If you find something that is not understandable or needs to be updated, please let us know. You can create an issue reporting this, or fix it yourself and submit a Pull Request to this repository.
Preparation
Start by ensuring you have all the necessary tools and files. This includes your NSPanel device, a stable internet connection, and access to your Home Assistant instance.
If flashing it for the first time, please look for additional preparation and tools on the Flashing the device for the first time section later in this guide.
ESPHome firmware
Preparing the ESPHome environment
In order to flash your NSPanel, you need a firmware generated by ESPHome. You can use ESPHome as an add-on in your Home Assistant, installed locally in your computer or any other type of installation. This guide will be based on the ESPHome dashboard which is available in all implementations.
- For more information on how to install ESPHome as an add-on to your Home Assistant, please refer to this external guide: Getting Started with ESPHome and Home Assistant
- For more information on how to install ESPHome manually in your computer, please refer to this external guide: Installing ESPHome Manually
Setup a device on ESPHome Dashboard
Once you have the ESPHome Dashboard available, please follow the steps bellow:
-
Click the button + New device
-
Add the unique name of your new device in ESPHome:
-
Select ESP32 as device type:

-
Click Skip button, as we don't want to start the installation yet:

-
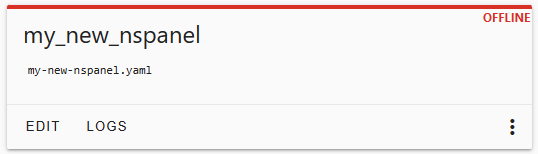
Find the entry related to your newly created device in the ESPHome Dashboard and click the button Edit.
-
In the yaml dialog, you might want to copy the
api:area to another temporary file, just in case. That is not really necessary, but can be used to improve the security in your system (more details later).
-
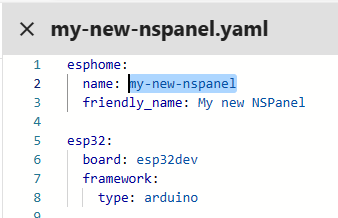
Take note also of the device name in the beginning of the file. Under
esphome, it is the value forname(in this examble, the device name ismy-new-nspanel, with dashes between the words):
-
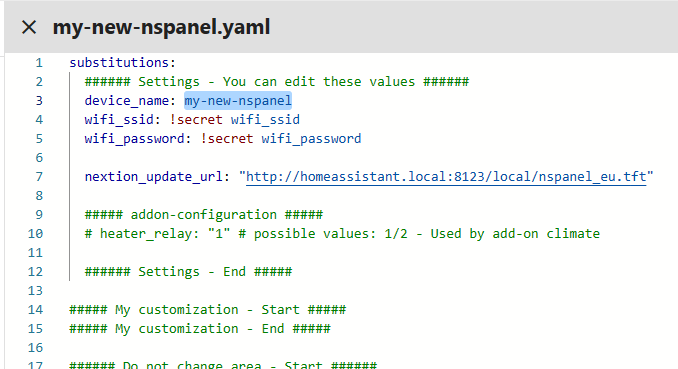
Clear all the content and paste the following:
substitutions:
  ###### Settings - You can edit these values ######
  device_name: "YOUR_NSPANEL_NAME"
  wifi_ssid: !secret wifi_ssid
  wifi_password: !secret wifi_password

  nextion_update_url: "http://homeassistant.local:8123/local/nspanel_eu.tft"

  ##### addon-configuration #####
  # heater_relay: "1" # possible values: 1/2 - Used by add-on climate

  ###### Settings - End #####

##### My customization - Start #####
##### My customization - End #####

###### Do not change area - Start ######
packages:
  remote_package:
    url: https://github.com/Blackymas/NSPanel_HA_Blueprint
    ref: main
    files:
      - nspanel_esphome.yaml # Core package
      # - advanced/esphome/nspanel_esphome_advanced.yaml # activate advanced (legacy) elements - can be useful for troubleshooting
      # - nspanel_esphome_addon_climate_cool.yaml # activate for local climate (cooling) control
      # - nspanel_esphome_addon_climate_heat.yaml # activate for local climate (heater) control
      # - nspanel_esphome_addon_climate_dual.yaml # activate for local climate (dual) control
    refresh: 300s

esp32:
  framework:
    type: esp-idf
###### Do not change area - End ######


-
Edit the Settings area. As your device name, ideally use the same device name you recorder on the step 7:
-
For
wifi_ssidandwifi_passwordyou can either replace the existing text by your Wi-Fi credentials or, if you want to keep that information a bit safer (and make easier to share your setting later to help someone or to ask for help), you can leave as it is and edit this later by clicking on the button Secrets in the top right area of the ESPHome Dashboard.
This is a quite objective video about secrets if you want to see how it works: YouTube - 3ATIVE VFX Studio - Home Assistant guide: How I use Secrets in ESPHome -
You can also edit
nextion_update_urlto point to a local copy of the TFT file.
We will come back to this on the Upload TFT section, but it is important to know that you have this option which could be useful if your panel don't have access to the Internet or if you have trouble when uploading the TFT file directly from the GitHub repository. -
(optional) You can optionally enable API encryption by adding the key copied on step 6 and adding it to the My customization area. This will encrypt the communication between your panel and Home Assistant, which may be important if you will use your panel to transfer sensitive information, like a pin code when disabling an alarm.
This can be set later, if you want to skip it for now.

-
When all settings are correct, click the button Save in the top and close this yaml window.


Done! Your NSPanel is all set into your ESPHome Dashbord.
Flashing the device for the first time
Drive safe
| ⚠️ WARNING |
|---|
| Make sure your panel's controller module is disconnected from main power during all the work. If your device is open and plugged directly into the wall, you’ll be a single touch away from being electrocuted. |
| ⚠️ WARNING |
|---|
| You are solely responsible for your own safety. If you feel something is wrong or are uncomfortable with continuing, stop immediately. |
- Don't use any eletronic component above 3.3VDC. Make sure you TTL adapter is set to 3.3VDC. Any value above this treshold can permanently damage your panel.
- Use a clean area when disassembling your device and make sure you don't scratch your device's screen.
- Keep all the parts (screws, cables, etc.) safe.
Tools:
If you are going to flash your NSPanel with ESPHome for the first time you also may need:
- USB-to-Serial TTL adapter
- jumper wires
- breakable headers (optional)
- An appropriated screw driver for unassembling your panel's controller module (touch plate)
Connecting your device via USB-to-Serial TTL interface
Before start unassembling your panel, please take a look at the following material:
- YouTube - Mark Watt Tech - HOW TO - Setup the SIMPLEST Smart Home Scene Controller
- @blakadder's Sonoff NSPanel EU Switch in Detail
- ESPHome - Physically Connecting to your Device
<<add pictures of the board & wiring>> <> <>
Making changes Over The Air (OTA)
<< add instructions how to flash wirelessly>>
Updating
<< add instructions how to flash wirelessly>> << considerations - update all to the same version >>
Migrating from other custom firmware
Upload TFT
Select the right file
Uploading to Nextion
Blueprint
Importing the blueprint
Creating an automation
Selecting the panel
How to handle multiple panels
Additional info
===================================== TO BE REMOVED ===================================== This section covers the initial configuration. All important steps for installation and setup of ESPHome and the Blueprint are described here.
⭐ Step by Step Setup Video
ATTENTION! if you have already installed the version "nspanel-lovelace-ui" from joBr99 on your NSPanel, an intermediate step is necessary - otherwise it is not possible to install this or any other version.
NOTE! We are not EN native speakers, there may well be errors in translation or sentence structure. If something is wrong or unclear an "Issue" can be opened. If you want to help us, feel free to propose a change directly in GitHub or please get in contact with us.
Content:
- Short version of the setup of Esphome and Blueprint
- Version "nspanel-lovelace-ui" by joBr99 was previously installed
- Advanced configuration for all ESPHome and Home Assistant professionals
- Step by Step Configuration and setup of ESPHome and Blueprint
1. Short version of the setup of Esphome and Blueprint
(for those who already have experience with ESPhome and Home Assistant)
1. First you have to install the Blueprint. For this please use the following link

It is also possible to copy the code from the file "nspnael_blueprint.yaml " and paste it into HA. You can find instructions for this under Using Automation Blueprints and Automation blueprint tutorial
2. You have to download the file nspanel_us.tft or "nspanel_eu.tft" from Github

3. Upload the file to your Home Assistant Server in the www folder, see Home Assistant HTTP 'Hosting Files' section for details.

4. In the next step you have to create a new ESP32 device in ESPHome
5. When the new ESP32 device has been created, next click "Edit " on the device you have just created to open the web editor. Now the following code must be copied and pasted.
❗ IMPORTANT! The already existing code in the ESPHome file must be "COMPLETELY " deleted and "REPLACED " by the code below.
❗ IMPORTANT! in the block "CHANGE ME " all values (device_name, wifi_ssid, wifi_password, nextion_update_url ) in the " " must be replaced by your own values. It is also possible to work here with "!secret ".
CODE:
substitutions:
  ###### CHANGE ME START ######
  device_name: "YOUR_NSPANEL_NAME"
  wifi_ssid: !secret wifi_ssid
  wifi_password: !secret wifi_password

  nextion_update_url: "http://homeassistant.local:8123/local/nspanel_eu.tft"
  nextion_blank_url: "http://homeassistant.local:8123/local/nspanel_blank.tft"

  ##### addon-configuration #####
  ## addon_climate ##
  # addon_climate_heater_relay: "1" # possible values: 1/2

  ##### CHANGE ME END #####

packages:
  remote_package:
    url: https://github.com/Blackymas/NSPanel_HA_Blueprint
    ref: main
    files:
      - nspanel_esphome.yaml # Core package
      # - advanced/esphome/nspanel_esphome_advanced.yaml # activate advanced (legacy) elements - can be useful for troubleshooting
      # - nspanel_esphome_addon_climate_cool.yaml # activate for local climate (cooling) control
      # - nspanel_esphome_addon_climate_heat.yaml # activate for local climate (heater) control
      # - nspanel_esphome_addon_climate_dual.yaml # activate for local climate (dual) control
    refresh: 300s

esp32:
  framework:
    type: esp-idf

##### My customization - Start #####
##### My customization - End #####
⚠️ The following TFT files are available and can be replaced in your URL accordingly:
nspanel_eu.tft(European layout)nspanel_us.tft(US layout)nspanel_us_land.tft(US layout - landscape orientation)
6. Now the NSPanel can be flashed with the new ESPHome code.
How to flash the NSPanel you can see here: HowTo - Flash NSPanel with ESPhome
7. After the NSPanel is flashed, you can go to "Settings --> Devices & Services --> Add Integration" to add your new device and finish setting it up.
8. In the last step, only the TFT must be uploaded. To do this, open your new device in the ESPHome integration and activate the item "Update TFT display " under "Configuration". Now the current TFT file is loaded from local Home Assistant Server or GitHub and uploaded to your NSPanel. ATTENTION! This process will take up to 30 minutes.
9. Now the setup of ESPHome and NSPanel is completed.
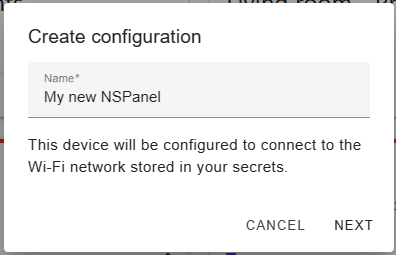
10. Now you can configure your NSPanel via the Blueprint. To do this, go to "Settings --> Automations & Scenes --> Templates --> NSPanel Configuration --> CREATE AUTOMATION" and start with the setup of the NSPanel.
NOTE! In the blueprint, the field "NSPanel device" is required. Although you can still save the automation without a device selected, it would be unusable without that information.
2. Version "nspanel-lovelace-ui" by joBr99 was previously installed
See (EN) Common Issues | TFT Upload When nspanel lovelace ui has been installed
3. Advanced configuration for all ESPHome and Home Assistant professionals
ATTENTION! Customizations and advanced mode are not supported by this project's team. Use this with caution and only when you know what you are doing.
Before you start customizing your system, we would like to invite you to share anything nice you achieve. You can always create a new Pull Request to dev branch and this will give a chance for other users with similar challenges to take advantage of your discoveries.
The simpler way to go "advanced" with ESPHome is to use "Customizations". We have a page specifically for that where, again, your contribution is very welcome: Customization
If you want for some reason use a local copy of nspanel_esphome.yaml, you can copy the file from GitHub to you local file system and reference in your ESPHome settings like this:
substitutions:
  ###### CHANGE ME START ######
  device_name: office-workstation-panel
  wifi_ssid: !secret wifi_ssid
  wifi_password: !secret wifi_password

  nextion_update_url: "http://homeassistant.local:8123/local/nspanel_eu.tft"
  nextion_blank_url: "http://homeassistant.local:8123/local/nspanel_blank.tft"

  ##### CHANGE ME END #####

packages:
  local_package: !include packages/nspanel_esphome.yaml

esp32:
  framework:
    type: esp-idf
Note that a sub-folder was used in the example above in order to avoid that file to be added as an additional device in your ESPHome dashboard. You can also have the file in the same folder, but with it's name starting with
., so ESPHome dashboard understands that file should be ignored when listing devices.
- Blueprint file "nspanel_blueprint.yaml " can also be installed manually.
- There is also the possibility to upload the TFT file "nspanel_us.tft " manually. The whole thing can also be combined with a "Folder Watcher ".
- additionally we provide the HMI files "nspanel_xx.HMI " for the Nextion Editor to customize graphics and programming if needed.