 [](https://github.com/hacs/integration)

[](https://jessemillar.com/r/man-hours)
NsPanel Lovelace UI is a Firmware for the nextion screen inside of NSPanel in the Design of [HomeAssistant](https://www.home-assistant.io/)'s Lovelace UI Design.
**EU Model and US Model supported (in portrait and landscape orientation)**
Content of the screen is controlled by a AppDaemon Python Script installed on your HomeAssistant Instance.
Or an TypeScript on your ioBroker Instance in case you are an ioBroker User.
NsPanel needs to be flashed with Tasmota (or upcoming with ESPHome)
## Features
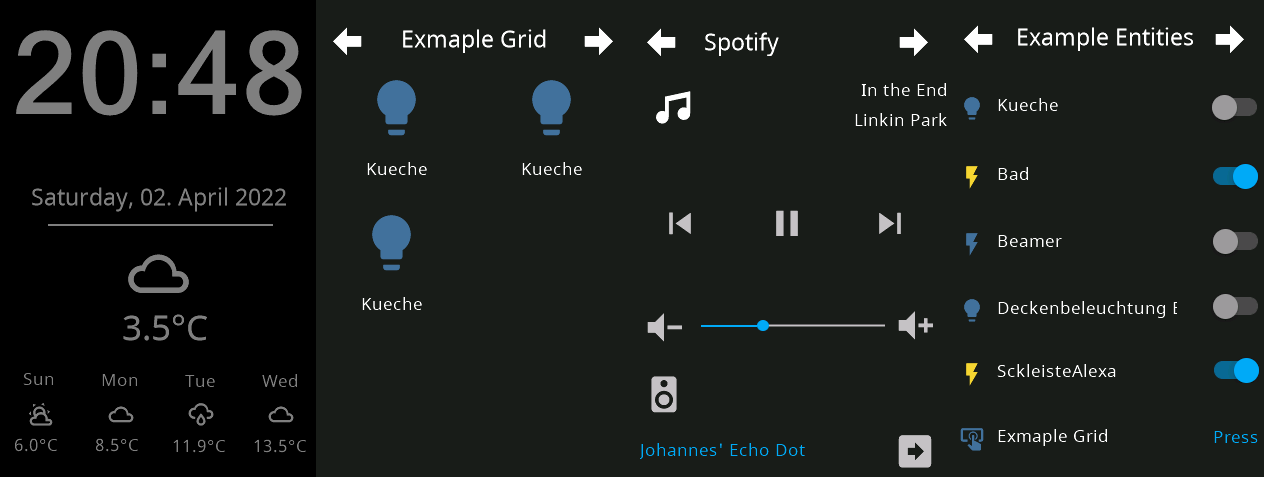
- Entities Page with support for cover, switch, input_boolean, binary_sensor, sensor, button, number, scenes, script, input_button and light, input_text (read-only), lock, fan
- Grid Page with support for cover, switch, input_boolean, button, scenes, light and lock
- Detail Pages for Lights (Brightness, Temperature and Color of the Light) and for Covers (Position)
- Thermostat Page
- Media Player Card
- Alarm Control Card
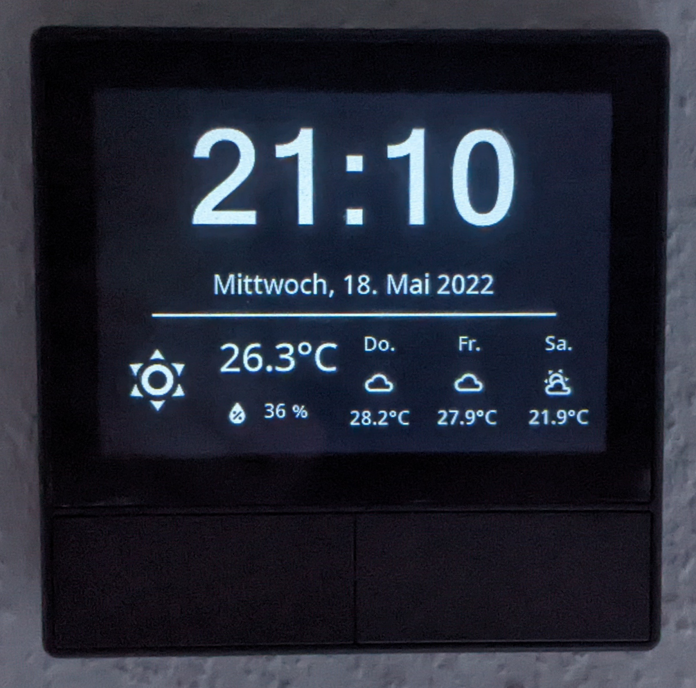
- Screensaver Page with Time, Date and Weather Information
- Card with QrCode to display WiFi Information
- Localization possible (currently 38 languages)
- **Everything is dynamically configurable by a yaml config, no need to code or touch Nextion Editor**
It works with [Tasmota](https://tasmota.github.io/docs/) and MQTT.
To control the panel and update it with content from HomeAssistant there is an [AppDaemon](https://github.com/AppDaemon/appdaemon) App.
See the following picture to get an idea of the look of this firmware for NSPanel.

Some (not all) screenshots from the US Portrait Version:
## TLDR
1. Install Tasmota to NSPanel
2. Install Berry Driver in Tasmota and setup MQTT
3. Flash Nextion Firmware
4. Install AppDaemon, setup MQTT and install Backend Application
For more detailed Instructions see the following Sections:
- [Requirements](#requirements)
- [Installation - Home Automation Part (Home Assistant)](#installation---home-automation-part-home-assistant)
- [Installation - Home Automation Part (IoBroker)](#installation---home-automation-part-iobroker)
- [Installation - NSPanel Part (Firmware)](#installation---nspanel-part)
- [Configuration](#configuration)
- [Configuring the MQTT integration in AppDaemon](#configuring-the-mqtt-integration-in-appdaemon)
- [Configure your NSPanel in AppDaemon](#configure-your-nspanel-in-appdaemon)
- [How to update](#how-to-update)
- [FAQ](#faq---frequently-asked-questions)
## Requirements
- NSPanel
- USB to Serial TTL Adapter
- Running Instance of the Home Automation Platform of your Choise
- Running [Home Assistant Instance](https://www.home-assistant.io/installation/)
- with installed [MQTT Broker](https://www.home-assistant.io/docs/mqtt/broker)
- Running [ioBroker Instance](https://www.iobroker.net/#en/documentation)
- with installed MQTT Broker
## Installation - Home Automation Part (Home Assistant)
This section describes the Installation Steps for HomeAssistant, follow each step.
[](https://github.com/hacs/integration)

[](https://jessemillar.com/r/man-hours)
NsPanel Lovelace UI is a Firmware for the nextion screen inside of NSPanel in the Design of [HomeAssistant](https://www.home-assistant.io/)'s Lovelace UI Design.
**EU Model and US Model supported (in portrait and landscape orientation)**
Content of the screen is controlled by a AppDaemon Python Script installed on your HomeAssistant Instance.
Or an TypeScript on your ioBroker Instance in case you are an ioBroker User.
NsPanel needs to be flashed with Tasmota (or upcoming with ESPHome)

## Features
- Entities Page with support for cover, switch, input_boolean, binary_sensor, sensor, button, number, scenes, script, input_button and light, input_text (read-only), lock, fan
- Grid Page with support for cover, switch, input_boolean, button, scenes, light and lock
- Detail Pages for Lights (Brightness, Temperature and Color of the Light) and for Covers (Position)
- Thermostat Page
- Media Player Card
- Alarm Control Card
- Screensaver Page with Time, Date and Weather Information
- Card with QrCode to display WiFi Information
- Localization possible (currently 38 languages)
- **Everything is dynamically configurable by a yaml config, no need to code or touch Nextion Editor**
It works with [Tasmota](https://tasmota.github.io/docs/) and MQTT.
To control the panel and update it with content from HomeAssistant there is an [AppDaemon](https://github.com/AppDaemon/appdaemon) App.
See the following picture to get an idea of the look of this firmware for NSPanel.

Some (not all) screenshots from the US Portrait Version:

## TLDR
1. Install Tasmota to NSPanel
2. Install Berry Driver in Tasmota and setup MQTT
3. Flash Nextion Firmware
4. Install AppDaemon, setup MQTT and install Backend Application
For more detailed Instructions see the following Sections:
- [Requirements](#requirements)
- [Installation - Home Automation Part (Home Assistant)](#installation---home-automation-part-home-assistant)
- [Installation - Home Automation Part (IoBroker)](#installation---home-automation-part-iobroker)
- [Installation - NSPanel Part (Firmware)](#installation---nspanel-part)
- [Configuration](#configuration)
- [Configuring the MQTT integration in AppDaemon](#configuring-the-mqtt-integration-in-appdaemon)
- [Configure your NSPanel in AppDaemon](#configure-your-nspanel-in-appdaemon)
- [How to update](#how-to-update)
- [FAQ](#faq---frequently-asked-questions)
## Requirements
- NSPanel
- USB to Serial TTL Adapter
- Running Instance of the Home Automation Platform of your Choise
- Running [Home Assistant Instance](https://www.home-assistant.io/installation/)
- with installed [MQTT Broker](https://www.home-assistant.io/docs/mqtt/broker)
- Running [ioBroker Instance](https://www.iobroker.net/#en/documentation)
- with installed MQTT Broker
## Installation - Home Automation Part (Home Assistant)
This section describes the Installation Steps for HomeAssistant, follow each step.
### Installing AppDaemon The backend application for HomeAssistant is written in a python for [AppDaemon](https://github.com/AppDaemon/appdaemon). This means it requires a working and running installation of AppDaemon. The easiest way to install it is through Home Assistant's Supervisor Add-on Store, it will be automaticly connected to your Home Assistant Instance. 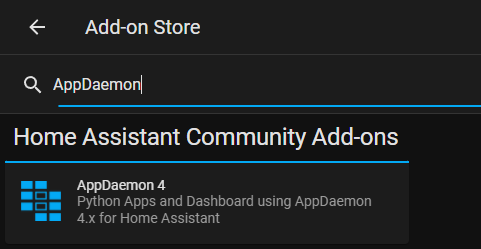 #### Add babel package to AppDaemon Container (Optional) For localisation (date in your local language) you need to add the python package babel to your AppDaemon Installation. 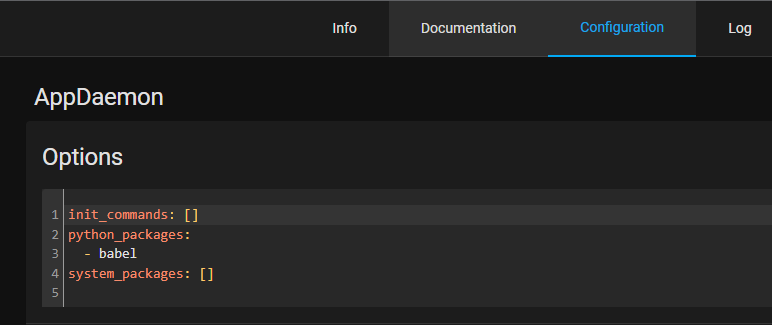 ### Installing Studio Code Server (optional, recommended) You will need a way to edit the `apps.yaml` config file in the Appdaemon folder. Install Studio Code Server from Home Assistant's Supervisor Add-on Store to easily edit configuration Files on your HomeAssistant Instance.
### Installing HACS HACS is the Home Assistant Community Store and allows for community integrations and automations to be updated cleanly and easily from the Home Assistant web user interface. It's simple to install the AppDaemon app without HACS, but keeping up to date requires manual steps that HACS will handle for you: you will be notified of updates, and they can be installed by a click on a button. If you want to use HACS, you will have to follow [their documentation on how to install HACS](https://hacs.xyz/docs/setup/download).
### Installing AppDaemon Backend Application To install Lovelace UI Backend App with HACS, you will need to make sure that you enabled AppDaemon automations in HACS, as these are not enabled by default: 1. Click on `Configuration` on the left menu bar in Home Assistant Web UI 2. Select `Devices & Services` 3. Select `Integrations` 4. Find `HACS` and click on `Configure` 5. In the window that opens, make sure that `Enable AppDaemon apps discovery & tracking` is checked, or check it and click `Submit` 6. If you just enabled this (or just installed HACS), you might have to wait a few minutes as all repositories are being fetched; you might hit a GitHub rate limit, which might then require you to wait a few hours for HACS to be fully configured. In this case, you won't be able to proceed to the next steps until HACS is ready. Now, to install NSPanel Lovelace UI Backend with HACS, follow these steps: 1. Click on `HACS` on the left menu bar in Home Assistant Web UI 2. Click on `Automations` in the right panel 3. Click on `Explore & download repositories` in the bottom right corner 4. Search for `NSPanel`, and click on `NSPanel Lovelace UI Backend` in the list that appears 5. In the bottom right corner of the panel that appears, click on `Download this repository with HACS` 6. A confirmation panel will appear, click on `Download`, and wait for HACS to proceed with the download 7. The Backend Application is now installed, and HACS will inform you when updates are available
### Flash Tasmota to your NSPanel You need to connect to your nspanel via serial and flash the [tasmota32-nspanel.bin](https://github.com/tasmota/install/raw/main/firmware/unofficial/tasmota32-nspanel.bin) to your NSPanel. Make sure to come back to this guide, before uploading the nspanel.be/autoexec.be files. For more deatils see the [NSPanel Page of the Tasmota Template Repository](https://templates.blakadder.com/sonoff_NSPanel.html). ### Configure Tasmota Template for NSPanel Configure the NSPanel template for Tasmota. (Go to Configuration and Configure Other and paste the template there, make sure to tick the activate checkbox) 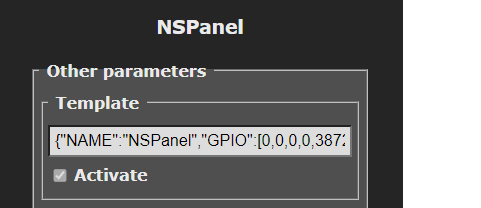 You can use the following template or copy the one on the [Tasmota Template Repo Site](https://templates.blakadder.com/sonoff_NSPanel.html). `{"NAME":"NSPanel","GPIO":[0,0,0,0,3872,0,0,0,0,0,32,0,0,0,0,225,0,480,224,1,0,0,0,33,0,0,0,0,0,0,0,0,0,0,4736,0],"FLAG":0,"BASE":1,"CMND":"ADCParam 2,11200,10000,3950 | Sleep 0 | BuzzerPWM 1"}` After a reboot of tasmota your screen will light up with the stock display firmware. ### Setup your MQTT Server in Tasmota Configure your MQTT Server in Tasmota. See Tasmota [MQTT Documentation](https://tasmota.github.io/docs/MQTT/) for more details. 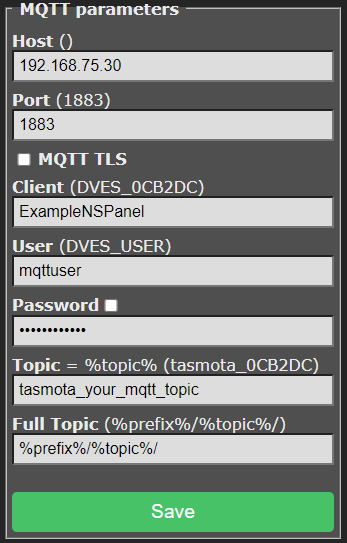 ### Upload Berry Driver to Tasmota 1. Download the autoexec.be from the repository: [Berry Driver](tasmota/autoexec.be) 2. Go to `Consoles` > `Manage File System` in Tasmota and upload the previously downloaded file. 3. Restart your NSPanel ### Flash Firmware to Nextion Screen Note for ioBroker Users: Check the Release Notes, if the ioBroker Backend is not up to date with the current release there will be a note and you have to flash the latest compatible version from there. #### Use your own Webserver Upload the nspanel.tft from the lastest release to a Webserver (for example www folder of Home Assistant) and execute the following command in Tasmota Console. (Development Version: [tft file from HMI folder](HMI/nspanel.tft)) **Webserver must be HTTP, HTTPS is not supported, due to limitations of berry lang on tasmota** `FlashNextion http://ip-address-of-your-homeassistant:8123/local/nspanel.tft` #### Use my webserver Due the limitations of Berry, it's not possible to download the tft file directly from github, so I'm also renting a small server where you can download the file via HTTP. Use the one following commands to flash the latest release from this repository, just execute the following Command in Tasmota: EU Version: `FlashNextion http://nspanel.pky.eu/lui-release.tft` US Version Portrait: `FlashNextion http://nspanel.pky.eu/lui-us-p-release.tft` US Version Landscape: `FlashNextion http://nspanel.pky.eu/lui-us-l-release.tft`
Support for ESPHome is WIP, see this third-party [ESPHome component](https://github.com/sairon/esphome-nspanel-lovelace-ui) which allows using ESPHome instead of Tasmota.
`"%I:%M ?%p"``dateAdditonalTemplate` | True | string | `" - {{ states('sun.sun') }}"` | Addional Text dispayed after Date, can contain Homeassistant Templates `dateFormat` | True | string | `%A, %d. %B %Y` | date format used if babel is not installed `cards` | False | complex | | configuration for cards that are displayed on panel `screensaver` | True | complex | | configuration for screensaver `hiddenCards` | True | complex | | configuration for cards that can be accessed though navigate items
- `af_xx` - Afrikaans - `ar_xx` - Arabic - `bg_xx` - Bulgarian - `ca_xx` - Catalan - `cs_xx` - Czech - `da_xx` - Danish - `de_xx` - German - `el_xx` - Greek - `en_xx` - English - `es_xx` - Spanish - `et_xx` - Estonian - `fa_xx` - Persian - `fi_xx` - Finnish - `fr_xx` - French - `he_xx` - Hebrew - `hr_xx` - Croatian - `hu_xx` - Hungarian - `hy_xx` - Armenian - `id_xx` - Indonesian - `is_xx` - Icelandic - `it_xx` - Italian - `lb_xx` - Luxembourgish - `lt_xx` - Lithuanian - `lv_xx` - Latvian - `nb_xx` - Norwegian - `nl_xx` - Dutch - `nn_xx` - Norwegian - `pl_xx` - Polish - `pt_xx` - Portuguese - `ro_xx` - Romanian - `ru_xx` - Russian - `sk_xx` - Slovak - `sl_xx` - Slovenian - `sv_xx` - Swedish - `th_xx` - Thai - `tr_xx` - Turkish - `uk_xx` - Ukrainian - `vi_xx` - Vietnamese